
Building Your Own Gaming PC: A Step-by-Step Guide
Posted on 12:50pm, Tuesday 3rd April, 2023
Is it hard to build your own gaming PC?
Building your own gaming PC can be an exciting and fulfilling adventure for both gamer and tech enthusiasts. Customizing it to meet your gaming preferences and performance requirements is exciting and fulfilling, but many may wonder: "Is it hard to build your own gaming PC?" As is often the case in life, the answer lies between ease and difficulty.
Building a gaming PC may seem daunting for those with little prior knowledge of computer hardware. The process requires selecting compatible components like motherboard, CPU, GPU, and RAM before carefully assembling them in the proper sequence. With numerous online resources and tutorials at their disposal, however, even novice computer enthusiasts can successfully construct their own gaming PCs.
By building your own high-end or low-end custom PC for gaming, not only do you gain more insight into its inner workings, but you also get the opportunity to design something completely bespoke. So whether you are an experienced techie or a curious newcomer, let us teach you how to build your own gaming PC.
Option #1 - Use an online PC Builder
The need for powerful yet efficient PCs has never been greater as the gaming world evolves. As graphics quality and complexity continue to advance, demand for top-tier hardware has surged; for many enthusiasts building your own PC has become an engaging hobby; using an online PC builder like Vibox is an invaluable way to design and construct the perfect gaming rig - this guide will explore its numerous advantages when used to construct one yourself and how using such tools makes this process more accessible, enjoyable, and efficient.
Though PC building offers numerous advantages, the process can still be daunting for beginners. There is an overwhelming array of PC components on the market as well as technical knowledge required to navigate compatibility and performance concerns that make this task seem impossible - this is why an online PC builder comes in.
An online PC builder is a web-based tool designed to simplify and expedite the process of building custom gaming PCs. These user-friendly platforms provide a comprehensive yet interactive guide for selecting components, assuring compatibility, optimizing performance, and meeting budget /preference needs - even those without prior PC building experience can confidently design and assemble a gaming rig that fulfill them, whilst taking advantage of technical support via email and phone.
One of the main benefits of an online PC builder is automatic compatibility check features. When users select parts, this tool automatically compares specifications and requirements to ensure everything will fit seamlessly together without the risk of purchasing incompatible hardware. Ensuring all chosen components are compatible is crucial for successful builds, and using an online PC builder removes much of the guesswork involved with this process.
Utilizing an online PC builder provides another significant benefit: optimizing performance based on individual needs and budget constraints. Users can prioritize specific aspects of their gaming experience, such as frame rates, resolution, or multitasking capabilities, and then identify components best suited to reaching these targets. In addition, this resource offers invaluable knowledge, such as product reviews, benchmarks, and comparison tools that make informed decisions simpler than ever.
As previously stated, using an online PC builder can save both time and effort by offering a convenient platform for researching, selecting, and purchasing components. Users can browse a comprehensive catalogue from retailers and manufacturers, compare prices between vendors, track sales discounts, and monitor discounts and sales events all from within one convenient place - making the entire experience less time-consuming and more enjoyable! Furthermore, many PC builders provide additional services like assembly support as well as warranty options - providing added peace of mind during or after their build.
Option #2 - Shop for parts and build it yourself
Building Your Gaming PC has quickly become popular among gaming enthusiasts for a good reason. Doing it yourself allows for unparalleled customization that perfectly meets your gaming needs and preferences, not to mention significant cost savings compared to buying pre-built machines from stores or online retailers. In this comprehensive introduction, we'll focus on the three essential steps necessary to Shop For Parts and Build It Yourself: initial preparation work, necessary PC build tools, and choosing an ideal case.
Prep Work
Before diving headfirst into Building your first PC, it's crucial to lay a solid foundation by performing extensive research, setting a budget, and outlining performance goals. The first step should be familiarizing yourself with all of the required components - these typically include a motherboard, CPU (processor), GPU (graphics card), RAM (memory), storage devices such as a Solid State Drive (SSD) or HDD drive, power supply unit (PSU) and an appropriate gaming PC case.
First, set your budget and performance goals. Consider what kinds of games you want to play, the visual quality you require, and the overall experience desired. A realistic budget will enable you to make informed decisions when selecting components - helping ensure the greatest return for your investment. Keep in mind that an ultra-high-performance PC may require more of an initial investment but could save money over time by remaining relevant longer.
Once your budget and performance goals are in mind, it's time to research the different components and brands on the market. Reading reviews, watching benchmark videos, and joining online forums or social media groups dedicated to PC building can provide insight into which components would best meet your requirements - by spending ample time conducting thorough research, you will be better equipped when purchasing parts for your gaming PC.
PREP 1: PC Build Tools

Building Your Own Gaming PC can be an exciting adventure but requires specific tools for an efficient assembly. Below are essentials tools needed for any PC build:
Screwdrivers: Investing in a quality, magnetized screwdriver set for building a gaming PC is essential. During construction, you will require both Phillips- and flat-head screwdrivers with various sizes for accommodating screws and connectors encountered during assembly.
Anti-static wrist strap: Static electricity can damage sensitive electronic components irreparably, so using an anti-static wrist strap when working on your gaming PC reduces the risk of electrostatic discharge from causing irreparable harm to sensitive electronic components.
Tweezers or needle-nose pliers: These tools are essential for handling small connectors and screws in tight spaces in your PC case, making work much simpler.
Zip ties or cable management clips: Cable management not only improves your gaming PC's aesthetics but can also significantly enhance airflow and overall system performance. Zip ties or cable management clips help keep cables organized during the build process so as not to cause obstructions during assembly.
Thermal paste and applicator: Thermal paste is essential to effective heat transfer between your CPU and cooler, and an extra bottle with its applicator could come in handy should reapplication become necessary during your build process. Most CPU coolers already include pre-applied thermal paste; having extra at your fingertips could come in handy should additional applications become necessary during assembly.
Building a gaming PC requires concentration and precision. A well-lit workspace will help keep track of components and tools easier, decreasing the risk of misplacing or damaging them during assembly.
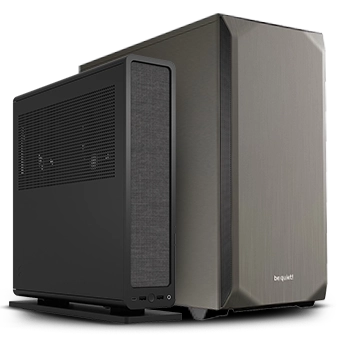
PREP 2: Gaming PC Cases
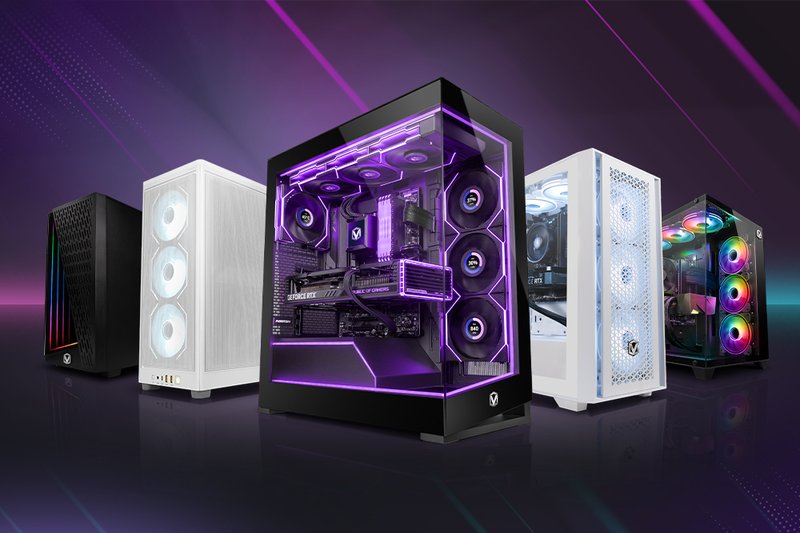
Selecting the ideal case for your custom-built gaming system is a crucial decision that will have both aesthetic and functional ramifications. Many factors need to be considered when making this choice, such as aesthetic appeal and usability considerations. When searching for your ideal case:
Size and Form Factor: Gaming PC cases come in various sizes, such as Mini-ITX, MicroATX, ATX, and Extended ATX (E-ATX). Your case's size should correspond with the motherboard's to ensure proper functionality; smaller cases tend to be more portable and space efficient, while larger cases offer more significant expansion potential, improved airflow, and easier cable management.
Design and aesthetics: Gaming PC cases come in an assortment of designs, colours, and materials to accommodate individual preferences and personal styles. Some cases offer features like tempered glass side panels or RGB lighting to add visual interest and elevate the visual appeal of your gaming setup. Choose a case that best matches your aesthetic preferences and gaming setup requirements.
Airflow and cooling: To maintain optimal temperatures in your gaming PC and extend its lifespan, optimal airflow is critical to ensure stable performance and component longevity. Look for cases with sufficient ventilation - including intake/exhaust fans and mesh panels or vents to allow enough airflow - that include intake and exhaust fans and mesh panels or vents to increase airflow. Furthermore, consider which solutions, such as air coolers, liquid cooling systems, or custom water cooling loops, will work with them before selecting your chosen case.
Expansion and Customization: When shopping for a gaming PC case, ensure it provides enough room for expansion and customization to allow upgrades over time. Also, check that it includes enough drive bays and expansion slots so as to facilitate any potential upgrades in the future.
Cable Management: Selecting a case equipped with advanced cable management features like rubber grommets, cable routing channels, and tie-down points can simplify the build process and produce a cleaner finished product. Proper cable management enhances aesthetics and airflow and boosts system performance overall.
Price: The cost of gaming PC cases varies widely depending on their size, design, and features. A higher-quality case could offer long-term advantages, such as increased durability, better airflow, and easier upgradeability - long-term investments may provide long-term returns! When considering budgetary considerations when shopping for one of these cases, make sure that features and aesthetics that matter are balanced with budget constraints.
Building Your Own Gaming PC can be an exciting and satisfying undertaking that allows you to craft the gaming system that perfectly suits your unique needs and preferences. By following essential first steps - such as conducting rigorous prep work, gathering all of the required PC build tools, and selecting an ideal case - a smooth building experience awaits. Once equipped with the necessary knowledge, tools, and components, building the perfect PC will become a reality - fulfilling all your performance, aesthetic, and satisfaction dreams.
PREP 3: Gaming PC Parts
Since its emergence, gaming has seen tremendous expansion worldwide, with millions of players enjoying an ever-expanding selection of games across various platforms. One popular way for gamers to experience ultimate gaming performance is through building their own gaming PC; customizing and upgrading it ensures you stay abreast of ever-evolving industry developments for an enjoyable, immersive gaming experience. This guide will walk through essential parts required when building one themselves.
Central Processing Unit (CPU)
The CPU, or Central Processing Unit, serves as the brain of your gaming PC. It executes instructions and processes data, making it one of the most vital parts of your system.
When selecting a CPU for yourself or someone else's use, consider factors like its number of cores, clock speed, and overall performance; modern gaming titles often demand powerful processors to provide smooth gameplay experiences.
Intel Core and AMD Ryzen are popular CPU manufacturers that provide processors to meet various budgets and performance levels. When choosing your processor, make sure it matches up with the socket type and chipset of your motherboard - otherwise compatibility issues could arise!
Graphics Processing Unit (GPU)
The Graphics Processing Unit, or GPU, is another integral part of your gaming PC. It is responsible for rendering images, animations, and videos onto your monitor screen - this component has a major influence on your gaming experience as it determines details like frame rates and visual quality - when selecting one, make sure to take into account factors like performance memory and power consumption before making your choice.
NVIDIA and AMD are two of the premier manufacturers of GPUs, with the NVIDIA Geforce series taking the top spot, which offers an assortment of options to meet various budgets and performance specifications. When selecting your GPU, ensure it works with your motherboard and power supply unit; high-performance cards may require extra power connectors.
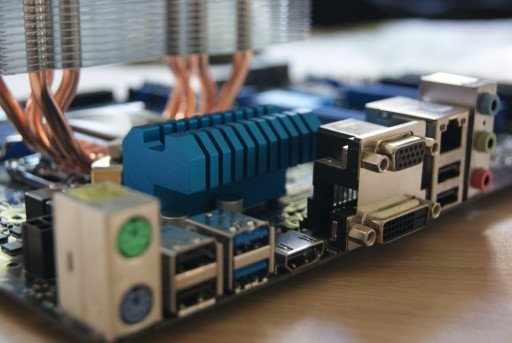
Motherboard
Your motherboard serves as the core of your gaming PC, connecting all its components and ensuring they work effectively together. When choosing one, be mindful of factors like size, socket type, chipset, expansion slots, and connectivity options when making your decision.
Motherboards come in various form factors, known as ATX, Micro-ATX, and Mini-ITX. Your motherboard size will dictate both its impact on case dimensions as well as expansion slots and connectivity options available to you. When choosing your motherboard, it must work seamlessly with both CPU, GPU, and other components to avoid potential compatibility issues.
Random Access Memory (RAM)
Random Access Memory, or RAM, is short-term memory on a gaming PC responsible for temporarily storing information currently being used by applications and programs.
Adding more RAM will make the gaming experience smoother as your system can manage more data simultaneously; when selecting RAM, take into account factors like capacity, speed, and latency when making your selection decision.
Gaming PCs typically require at least 16GB of RAM, with 32GB optimal. Selecting RAM compatible with your motherboard and at speeds that suit your CPU.
Storage Options: Solid State Drives (SSDs), Hard Disk Drives (HDDs).
Storage space is essential to your gaming PC, as it determines how much data can be stored and accessed. Two primary forms of storage are available to gamers: Solid-State Drives (SSDs) and Hard Disk Drives (HDDs). SSDs typically offer faster read/write speeds for faster load times and responsive systems; however, HDDs typically offer larger capacities at more competitive prices.
As part of a gaming PC build, using both SSDs and HDDs together to find an ideal balance between performance and storage capacity is recommended. You should install your operating system and frequently play games onto SSDs for quicker load times while using an HDD for larger files and less frequently accessed data storage needs. When choosing storage devices, ensure they're compatible with your motherboard and have all the necessary connectors.
Power Supply Unit (PSU)
Your Power Supply Unit, or PSU, provides power to all the components in your gaming PC. When selecting one, key elements include wattage, efficiency, modularity, and wattage - ensure it can support all components plus any future upgrades; additionally, an efficient PSU will consume less power and produce less heat, prolonging the component lifespan.
Modular power supplies (PSUs) allow you to remove unused cables, improving cable management and airflow within your system. Be sure that any modular PSU you purchase has all of the appropriate connectors for your motherboard, CPU, GPU, and storage devices.
System Cooling: CPU Cooling and Chassis Airflow
Effective cooling is key to the performance and lifespan of any gaming PC. There are two primary cooling methods - air cooling and liquid cooling. Fans and heatsinks provide air cooling, while liquid cooling relies on water blocks, radiators, and pumps to move to heat away from components.
CPU cooling is essential as overheating can significantly diminish performance and cause potential damage. While most CPUs come equipped with their own stock cooler, investing in an aftermarket cooler may significantly enhance cooling performance. To maintain proper airflow in your chassis, include enough intake and exhaust fans to maintain adequate air circulation and avoid heat build-up.
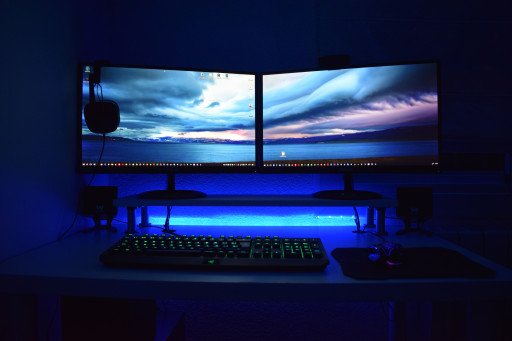
A comprehensive gaming experience begins with quality peripherals and accessories like monitors, keyboards, mice, and headsets. When choosing peripherals for yourself or others, consider factors like ergonomics, response time, and overall performance when making your selections. A high-quality gaming monitor with fast refresh rates and minimal input lag will significantly enhance the playing experience; similarly, a responsive keyboard and mouse can increase accuracy and enhance enjoyment levels significantly.
Operating System (OS)
A key consideration when building your gaming PC is choosing the operating system (OS). Microsoft Windows is widely considered the go-to choice, offering access to an impressive library of compatible games while supporting various hardware configurations.
Building a new PC can be an exhilarating and satisfying experience, giving you full control of how it meets your preferences and performance needs. Selecting compatible components will create a system with immersive gaming experiences; remembering to remember future upgrades as you select components is also vitally important. When selecting components, be mindful of compatibility issues and upgrade potential; do not hesitate to seek professional advice or consult online resources as necessary during this process.
Layout your components
Building Your Own Gaming PC can be an exciting project allowing you to design a system tailored to your needs and preferences. An essential step of this process is organizing components efficiently for optimal performance and ease of assembly - this guide will take you step-by-step so you can confidently assemble your perfect gaming PC!
STEP 1: Install CPU

Your central processing unit (CPU) is at the heart of your computer, responsible for processing instructions and performing calculations. To install your CPU, locate its socket on your motherboard - typically, it will have a square shape with a lever or latch to open or close the socket - then lift this lever or latch.
Before installing the CPU, ensure its gold triangle aligns with the marking on its socket for proper alignment of the motherboard. Gently lower it into its slot until it sits flush with its surroundings; once secure, close its lever.
Step Two (Optional): Install M.2 SSDs
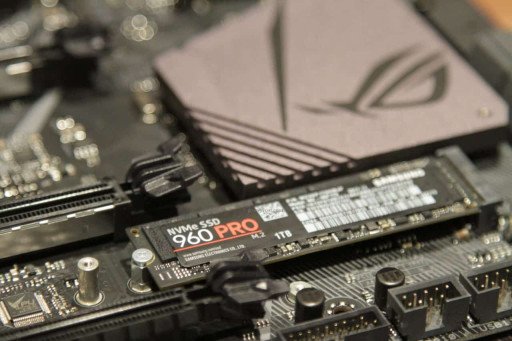
Solid-state drives (SSDs) provide fast data storage and retrieval. M.2 SSDs are compact high-performance drives explicitly designed to connect directly to a motherboard's M.2 slot. To install one successfully, find its location (usually an M-slot on the board). To install an M.2 SSD on your own motherboard, first, locate its M.2 connector - it should look similar to an elongated connector on an SD card - before connecting any drives directly. To successfully connect an M.2 SSD successfully, first locate its M.2 slot (within that area), then install its contents - then start reading from their elongated connector before continuing.
Install the M.2 SSD into its slot at a 30-degree angle, ensuring its notches align with those in its slot. Press down until it sits flat against your motherboard before using the provided screw to secure it to the motherboard. Repeat this process for each drive if your motherboard supports multiple M.2 SSDs.
Step 3: Install CPU Cooling Solutions
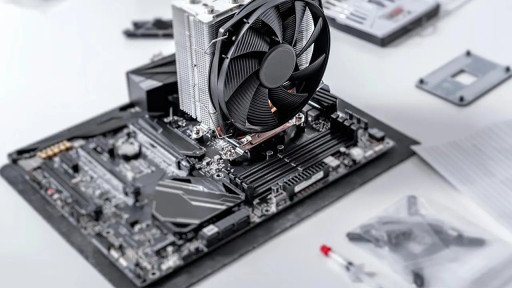
You'll need to implement a cooling solution to prevent your CPU from overheating. This may consist of installing a heatsink and fan or liquid cooling system; for air cooling, apply a small dab of thermal paste directly on top of your CPU and secure its mounting points with clips or screws provided; lastly, connect its power cable to its appropriate header on your motherboard.
If using liquid cooling, please follow the manufacturer's instructions on mounting the water block, pump, and radiator. Ensure thermal paste is applied evenly across your PC's surfaces and all connections are secure before beginning installation.
Step 4: Install Memory (RAM)
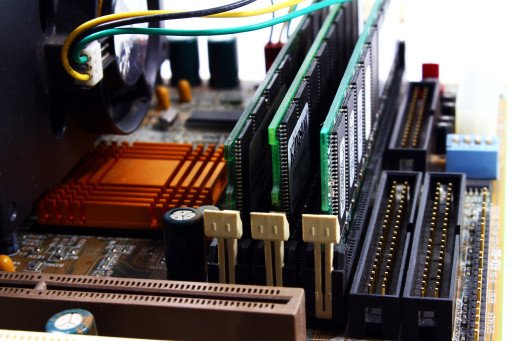
Random access memory (RAM) is vital to the performance of your PC, temporarily storing data for quick retrieval. Locate the RAM slots on your motherboard - they typically feature long, narrow connectors - and open their latches.
Align the notches on your RAM modules with those found in their slots and apply equal pressure at both ends until the module clicks into place and latches close - this process should be repeated for every RAM module, following your motherboard's recommended configuration for optimal performance.
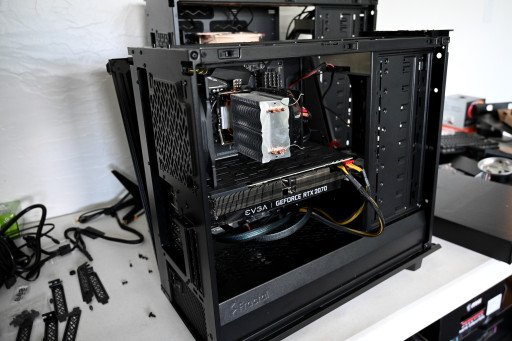
STEP 5: (Optional) Do a Test Run Outside the Case
Before installing components into your case, it is wise to conduct a test run to ensure everything works. Assemble your motherboard, CPU, CPU cooler, RAM, and graphics card (if applicable) onto an inert surface such as wood or the motherboard's box before running a diagnostic test.
Connect the components, then connect a monitor and peripherals. Turn on the power supply and short the power switch pins on your motherboard with a screwdriver to simulate pressing the power button. If the system boots and displays output on the monitor, installation in its case can continue; otherwise, troubleshoot any potential issues first before continuing.
STEP 6: Mount the Power Supply
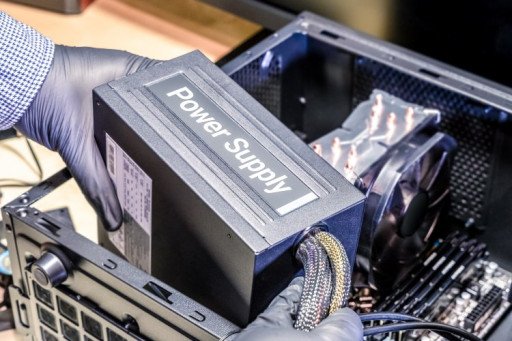
Power supply units (PSU) provide power to your system components. To install one in your case, locate its designated mounting location - usually either the bottom or top corner - then align its holes with mounting holes, positioning its fan correctly for optimal airflow (consult your case manual if unsure), and using supplied screws, secure it securely.
Step 7: Install the Motherboard
Before installing the motherboard, ensure the case's standoffs (small metal or plastic pegs) are established appropriately for its form factor. These standoffs protect both components by reducing the risk of direct contact between the motherboard and case, thereby decreasing electrical shorts.
Put the motherboard inside its case, with its screw holes aligned with standoffs. Secure it using the included screws; each standoff should have its own set. Be careful not to overtighten them, as doing so could damage the motherboard.
STEP 8: Install GPU
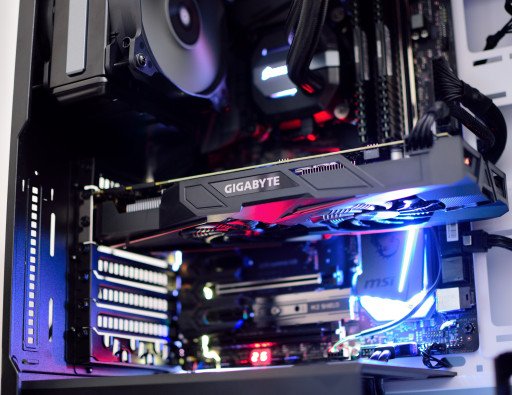
A graphics processing unit (GPU) renders images and videos, making it key for gaming performance. To install one on your motherboard, locate the PCIe slot nearest your CPU - usually the longest slot on this scale.
Remove any expansion slot covers on the case before gently inserting the GPU into a PCIe slot, ensuring its connector aligns with its slot. Apply even pressure until it clicks into place and its latch secures it - then use the screws supplied to mount and secure the GPU to the case and connect any required power cables from your PSU.
STEP 9: Install Storage
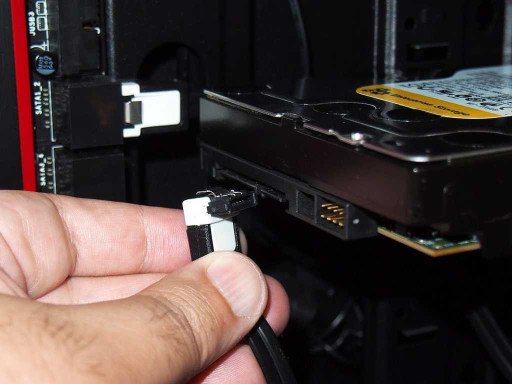
Once M.2 SSDs were installed earlier, additional 2.5-inch SSDs or 3.5-inch hard drives (HDDs) might also need to be added as extra storage. To install them in your case, locate their designated mounting areas - these could include trays, cages, or brackets, depending on their design - before mounting these drives securely in their slots.
Secure SSDs or HDDs to their respective mounting locations using screws or toolless mounting mechanisms provided with them. Once these drives have been securely attached, connect their SATA data cables directly to the motherboard before attaching their power cables from your PSU.
Step 10: Install the Operating System.
Once all components have been assembled, installing your operating system (OS) is time. Create a bootable USB drive with your desired OS (e.g., Windows or Linux) using another computer, then plug this into your new gaming PC alongside its monitor, keyboard, and mouse.
Turn on your system and enter BIOS by pressing the appropriate key during boot-up (usually displayed on-screen)-Configure boot settings to prioritize USB drives before saving and exiting BIOS. Your system should reboot, beginning the OS installation process - follow on-screen instructions until completion.
Once the OS is in place, download and install any necessary drivers, updates, or software to complete your gaming PC setup. Congratulations on successfully building and configuring your gaming PC; enjoy gaming on it and experience its enhanced experience.